
You've studied, worked hard and had the patience to take your kombucha through the initial fermentation process, and you realise that you do NOT have the flip-top bottles that everyone recommends for the second fermentation!
There's no need to be frustrated or depressed - there are plenty of solutions that don't involve rushing to the grocery shop and buying overpriced bottles that may or may not be suitable!
That's right, you don't have to settle for non-carbonated, unflavoured kombucha for this lot either.
Although we're sure it would still be delicious, there are plenty of ways to enjoy the benefits of secondary fermentation without making life too complicated!
Acceptable bottles for secondary fermentation that you probably have at home:
- Old wine bottles: use a cork or wine stopper
- Old bottles of store-bought kombucha
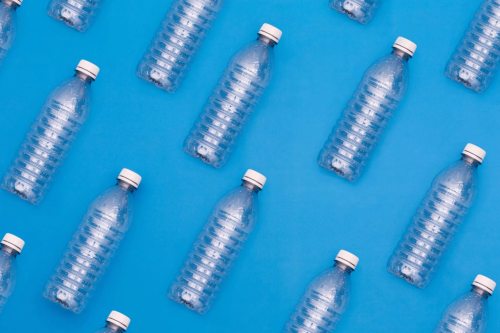
- Bottles of water or soft drinks
- Old beer bottles: you'll need corks for this option.
- Glass beer bottles (growlers)
- Mason jars IF you have plastic lids (wax paper between the jar and the lid will do if you don't have plastic lids).
For each of these options, the old bottle or container must be carefully cleaned and dried before being used as a secondary fermentation container.
You will also need to ensure that the container is not damaged and that the lid fits tightly to maintain carbonation.
What's more, whichever option you choose, you'll need to 'burp' the bottle every day during the second fermentation to avoid an explosion.
This means briefly lifting the cork to release the excess carbon dioxide in the bottle or container.
But wait: why is plastic acceptable for the second fermentation, but not for the first?
That's not quite true.
A number of factors make it possible to use plastic containers as a temporary solution for secondary fermentation.
We recommend that you invest in a longer-term solution, and we have a few recommendations for you in the rest of this article. For now, let's review the variables that make using plastic containers for secondary fermentation more feasible than primary fermentation:
Unfortunately, SCOBYs are rather fragile.
Plastic containers may contain chemicals that can damage SCOBY.
As the SCOBYs are removed before the secondary fermentation process, this problem only affects the primary fermentation.
Plastic scratches and spoils more easily over time than the recommended glass containers.
A scratch on a plastic container can allow harmful bacteria to grow inside undetected.
In this case, your Kombucha would be exposed to these bacteria.
This is unlikely to happen with an old bottle of water that you reuse once, but could easily happen with a large brewing container used for each brew.
Another important difference in this equation is the amount of time your precious Kombucha will spend with the plastic.
When it comes to primary fermentation, you use the same gallon jug each time you brew a new batch of Kombucha.
If you're using a plastic container for primary fermentation, you'll place your acidic Kombucha in the plastic for around 6 to 10 days at a time, over and over again.
Over time, it is thought that the acidity can wear away the plastic, creating a risk of harmful chemicals finding their way into the Kombucha.
For reasons related to the above points, we recommend that you use plastic bottles for secondary fermentation only once before recycling them.
This brings us to the next point...
These solutions should be temporary: what are the best bottles for long-term use in secondary fermentation?
To achieve maximum carbonation, you'll need a really airtight container.
As with primary fermentation containers, the best material to use for storing your precious kombucha during secondary fermentation is glass. Glass bottles with hinged lids are best for this purpose.
These bottles can be used for several brews, can be easily cleaned by hand and disinfected in the dishwasher, and should last for years!
What's more, they're very pretty and practical for drinking straight from the bottle!
We recommend buying at least a 6-pack of 16 oz bottles.
You should end up with 6 full bottles, two cups of starter tea for the next infusion, and a little extra to enjoy immediately after the primary fermentation while you prepare the rest for the second fermentation!
 You can certainly opt for different bottle sizes.
You can also opt for different sizes of flip-top bottles; a six-pack of 50 cl bottles is one of the most cost-effective options and works well for brewing 4 to 5 litres at a time.
You'll need to set aside around 2 cups of starter tea for each batch.
This will leave you with around 3-4 litres of liquid kombucha to bottle or drink after primary fermentation, depending on how much space you leave at the top of your gallon jug during primary fermentation.
If, for whatever reason, you're not a fan of flip-top bottles, a growler is another excellent option.
Once again, all sizes are suitable.
Once again, whichever option you choose, you'll need to 'burp' the bottle every day during the second fermentation to avoid an explosion.
This means briefly removing the cork to release the excess carbon dioxide in the bottle or container.
What is secondary fermentation?
If you've reached this point in the article without knowing what secondary fermentation is and where it fits into the overall kombucha brewing process, you'll probably want to read this article on the overall brewing process.
Secondary fermentation is always an optional stage; however, as you'll read in this article, this is where your kombucha can become carbonated and flavoured!


Leave A Comment